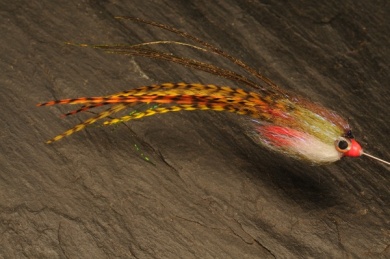
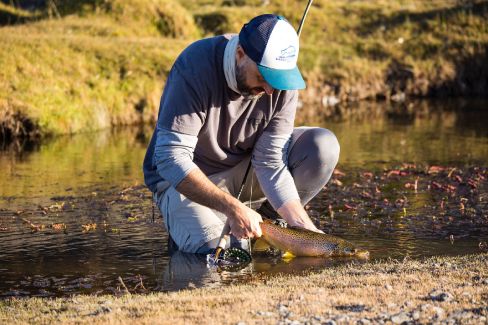
My romance with tube flies began over 32 years ago. The construction of Kautapen lodge was being finished and I was lucky to guide the first groups of anglers together with Rolland Holmberg, a known Swedish guide with lots of experience in Norwegian salmon rivers. He introduced me the tube flies.Rol View more...My romance with tube flies began over 32 years ago. The construction of Kautapen lodge was being finished and I was lucky to guide the first groups of anglers together with Rolland Holmberg, a known Swedish guide with lots of experience in Norwegian salmon rivers. He introduced me the tube flies.Rolland’s favorite was very simple, just a wing of black hair on a transparent tube with some metallic blue highlights. The front part of the tube was cut diagonally so it sunk rapidly. He also used a kind of white and black Sun Ray Shadow. I still have one of those Rolland tubes completely worn-out by the teeth of sea-run browns. He used double-handed rods, which conquered the Río Grande 30 years later.This tube here is the result of many tests while looking for big browns and I especially use it at the end of the season, therefore it’s called the Autumn Hope. The wing with multiple long fine feathers tied Flat Wing style with some highlights and peacock has incredible underwater movement, which gets better with a big head (but light, not heavy) made of dubbing in a special way that I took from wool head flies.The wing colors come from the type of being to imitate. Grizzly feathers dyed olive, orange and yellow work when there are pancoras (a kind of Patagonia crab), sculpin, perch and other small fish. Black, white or flashy colored ones are very effective too, but this particular one tied today is the one you will see on my leader more often.
Move the mouse over the image to zoom in the fly.
Touch the image to zoom in the fly.

List of materials
MaterialsTube: Eumer Ball Tube, 17mm.Thread: 6/0 hot orange.Body: Custom Dubbing, magenta or hot orange.Gills: Saddle hackle, red or Schlapen red.Wing: 6 to 8 grizzly feathers, dyed yellow, olive and orange.Highlights: Holographic Tinsel, olive.Head: Custom Dubbing or Senyo Lazer Dubbing; white, olive and brown.Eyes: Living Eyes by Fish Skull, 6mm.
Steps
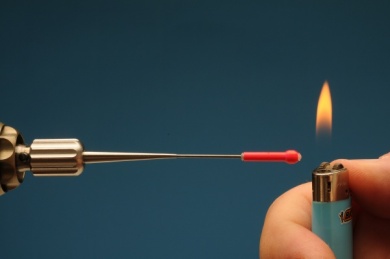
Step 1
Insert the plastic tube in the metal tube, to protect the tippet. Cut the plastic leaving 1mm or less on each end. Use the blue flame of a lighter to melt the ends, this will lock the plastic tube.
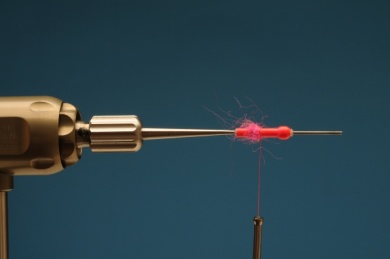
Step 2
Use some custom dubbing, magenta or orange, to shape a short body as seen in the picture. Use a wire brush or needle to loosen its hair.
Step 3
Tie and prepare a saddle bending the fibers to the back like we do with wets and streamers.
Step 4
Make a feather collar, making sure the fibers bend to the back. It’s better if its long, so it shows when we do the head, it should resemble the gills.
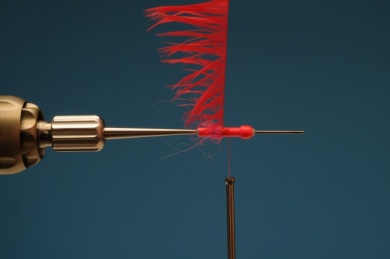
Step 5
For the wing, the length of the feathers should be slightly different so the move individually in the water. We can match the colors as we wish. Tie the feathers flat, with its curve pointing down, it increases the lateral moves. Tie them inside the leather skin, where the central quill is flat and translucent white. Here they will remain flat. Tie them complete, without peeling.First, tie a feather in the center. Then others at the sides, until you cover the top half of the fly. Then some flies View more...For the wing, the length of the feathers should be slightly different so the move individually in the water. We can match the colors as we wish. Tie the feathers flat, with its curve pointing down, it increases the lateral moves. Tie them inside the leather skin, where the central quill is flat and translucent white. Here they will remain flat. Tie them complete, without peeling.First, tie a feather in the center. Then others at the sides, until you cover the top half of the fly. Then some flies over these to add colors. The dyed grizzly feathers combined are very effective with trout, no matter how matter how many I use.

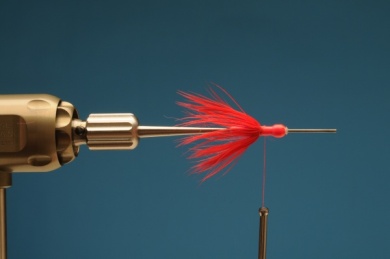
Step 6
Add 3 strands of holographic tinsel at the sides. It’s best to tie the tinsel on our side, then we take what’s left and bend it and tie it on the other side. This way it won’t loosen.
Step 7
Add some peacock strands on the back.
Step 8
Tie a bundle of custom dubbing or senyo dubbing (white) on the ventral side of the fly. The front fibers should be a bit shorter. This type of dubbing has long fibers, so it’s easy to make strong bundles with these fine fibers.
Step 9
Now tie an olive bundle at each side and a brown on the back in the same way as before. Don’t use many turns, only when tying the last bundle you should make several in the same spot to lock the bundles.
Step 10
Use a wire brush to comb the dubbing to the back. Hold it tight with your hand and take the thread forward. Thread the space between the metallic tube and the dubbing, tying slightly on the dubbing. Bundles should be even and tidy.
Step 11
Place the eyes and fill the space between them with a UV cement glue. Cover the eyes with the cement carefully, then use the lamp. Some enamel afterwards will eliminate the sticky uv layer. Alcohol and cotton are good to clean the head before using the enamel. If we don’t use transparent enamel, the head will be satin; fish don’t mind this for it goes transparent again when wet.
Step 12
The finished tube fly.