Foam is now available in variety of different forms and is here with us to stay replacing many materials such as the bodies of flies usually tied with dear hair as it is far more durable. Also with foam it is much easier to change the colours of the foam with permanent markers and offers more creati View more...Foam is now available in variety of different forms and is here with us to stay replacing many materials such as the bodies of flies usually tied with dear hair as it is far more durable. Also with foam it is much easier to change the colours of the foam with permanent markers and offers more creative possibilities.
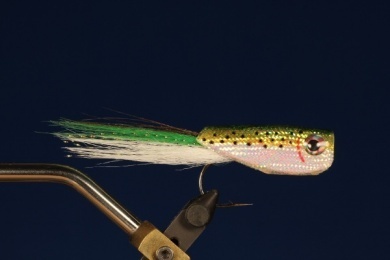
This fly is a variant of the Capt. Joe Blados, the crease fly, which has proven its effectiveness with many fish falling to this fly, although at first was used in saltwater for fish like striped bass and bluefish. Today we find many variations of this pattern with some being very simple and others more elaborate like this pattern which I have adapted to mimic a local species, the Mojarra.
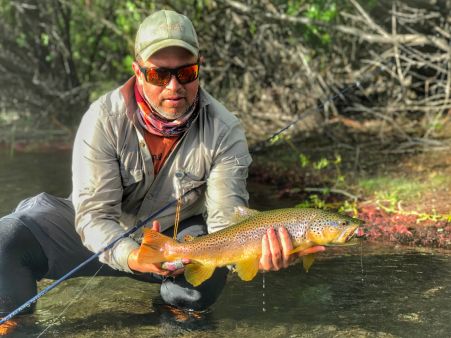
The crease fly is often more effective then poppers when they are worked with continuous jerks imitating a fish in trouble not leaving the surface. Even in areas with current it is very effective when you fish the fly erratically. It is a very good alternative if you want to try and entice a large brown trout in the rivers of Patagonia.
Move the mouse over the image to zoom in the fly.
Touch the image to zoom in the fly.

List of materials
Hook
Type 32807BLN or OWNER 5103 Mustad Worm hook, size 3/0
Thread
6/0 white
Tail
Peacock Herl, green Craft Fur, white and peacock Krystal Flash
Body
White Eva rubber or foam 2mm thick
Body Cover
Pearlescent mylar tube
EYES
Living Eyes of Fly Company Men
Steps
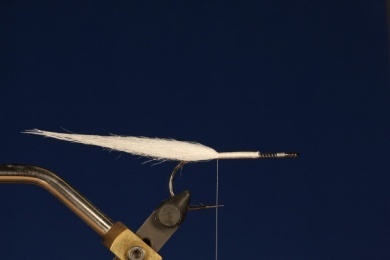
Step 1
We apply a little cyanoacrylate on the hook and tie a small clump of white Craft Fur into the end of the shank to create the tail.
Step 2
On top of the white Craft Fur Craft we tie an another small clump of green Craft Fur, before adding 6 strands of peacock hurl on top of this.
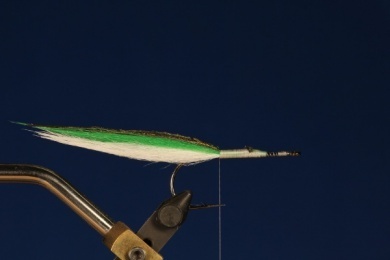
Step 3
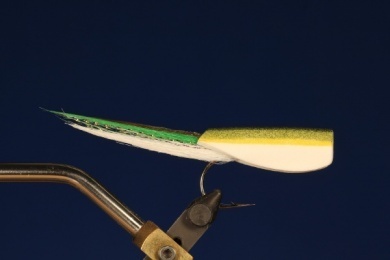
We tie two or three strands of Krystal Flash on each side of the Craft Fur and add the white foam body using cyanoacrylate. The body shape is shown in the photo but there are many variations of body length, width and overall shape according to the hook size and imitation. There are special cutters to crease this body to accelerate the process or use a template to create the same foam shape. Tie down the thread with a whip finish and trim. View more...We tie two or three strands of Krystal Flash on each side of the Craft Fur and add the white foam body using cyanoacrylate. The body shape is shown in the photo but there are many variations of body length, width and overall shape according to the hook size and imitation. There are special cutters to crease this body to accelerate the process or use a template to create the same foam shape. Tie down the thread with a whip finish and trim.
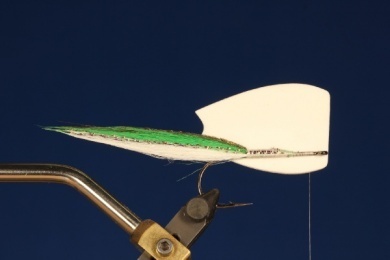
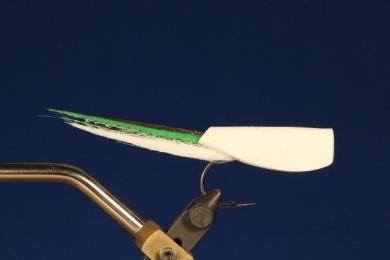
Step 4
We apply a bit of cyanoacrylate on the hook on our side and fold to stick together. Make sure the top section of the fly is hollow to allow the proper action of the fly.
Step 5
Use permanent markers to color the back a dark olive green and on both sides add two strips in light green and yellow.
Step 6
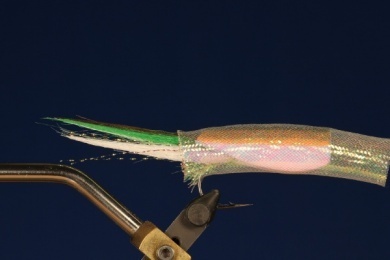
Calculate by hand and cut the appropriate amount of mylar tube needed to cover the body.
Step 7
This next step requires a little practice and is ideal to make a little test before tying material to the fly. Apply cyanoacrylate on the back and edges of the body, as well as the belly, mouth and tail. While cyanoacrylate is wet we must cover the body with the Mylar tube making sure it is tight to the body. Sometimes this can be difficult, therefore by using a PVC plastic to stick the mylar down can be more effective as it doesn’t stick with the cyanoacrylate. Trim the excess off. View more...This next step requires a little practice and is ideal to make a little test before tying material to the fly. Apply cyanoacrylate on the back and edges of the body, as well as the belly, mouth and tail. While cyanoacrylate is wet we must cover the body with the Mylar tube making sure it is tight to the body. Sometimes this can be difficult, therefore by using a PVC plastic to stick the mylar down can be more effective as it doesn’t stick with the cyanoacrylate. Trim the excess off.
Step 8
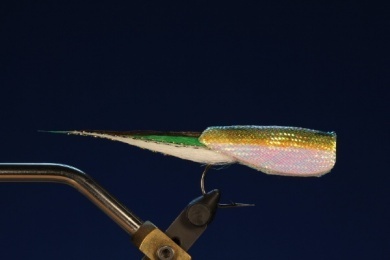
We then add the eyes and a thin layer of epoxy to make it crystal and smooth.
Step 9
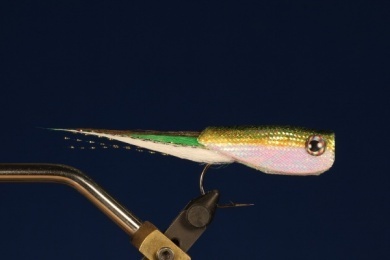
Add more features to the fly such as gill cover and spots across the body with a permanent marker.
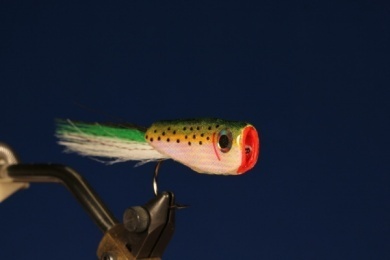
Step 10
This is the finished crease Mojarra from the front view showing the hollow crease.