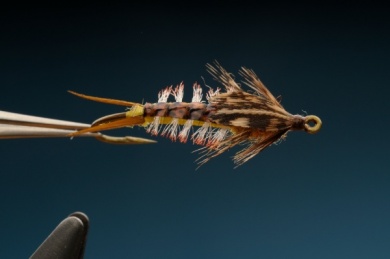
Step 1
View of the finished fly.
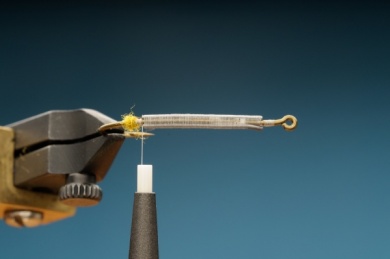
Step 2
Place a lead wire strap at each side and slightly lower than the hook shank, shaping it so it swims correcltly. Then make a small dubbing ball that will separate the tails. Cement the lead with cianoacrilate so it doesn’t move.
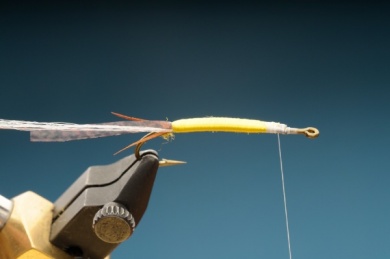
Step 3
Tie the biots. Then the monofilament, a fine strand of antron at one side, and on top some dotted thin skin. Give the skin a conic shape where we will tie it. Its general width must match exactly with the underbody done with the tying thread.

Step 4
Cover the abdomen with silk floss. It’s better to use one strand and go from the front to the back and then return, and tighten the floss.
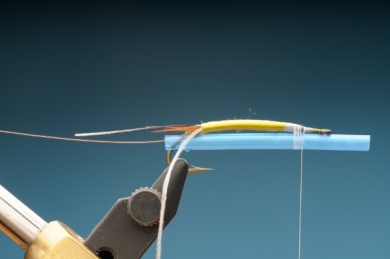
Step 5
Now it gets interesting. With a small plastic tube we’ll make a tool for the gills. Cut the tube so it fits and stays tight in the hook bend, so it doesn’t turn.
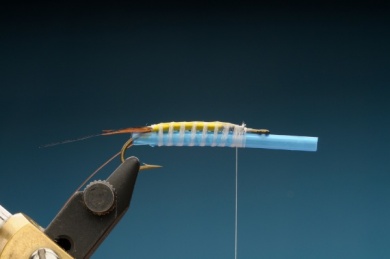
Step 6
Place the gills carefully, leaving some small place in between them. Tie and trim. Glue the gill turns to the floss at the back with 5 minute epoxy or UV glue. A very thin layer. Let it dry for 10 minutes.
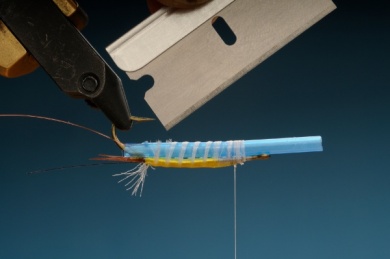
Step 7
Cut with a sharp razor. Untie the thread and remove the plastic tube.
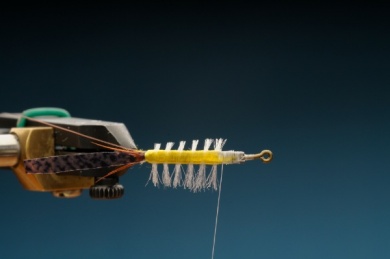
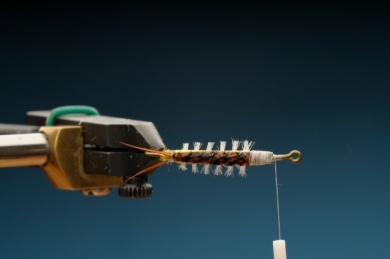
Step 8
The gills separate from the body but remain glued. One side has been already trimmed in this picture.
Step 9
Lower the thin skin, tie at the front and place the abdomen with the monofilament. Do not press the gills, separate them with a needle.
Step 10
Cover half the thorax with dubbing and tie the first two legs. Finish the thorax with more dubbing and two more legs. I use a pair or two of legs for small nymphs. After all, trout can’t count…

Step 11
With a special burner shape the wing case with a hungarian partridge feather. Before tying it, cement it so it lasts longer. On the thorax place a small amount of glue, set the wingcase there and tie it on the head. Apply pressure on it. Paint the tip (only the tip, softly) of the gills with brown permanent marker.

Step 12
Finished fly.