I’ve always been impressed by the European tiers because of the originality of their designs and wise use of natural and traditional materials, like deer hairs of all types. Francesco Palú’s flies guided me to explore the possibilities of using deer hair; I began using hair from different parts View more...I’ve always been impressed by the European tiers because of the originality of their designs and wise use of natural and traditional materials, like deer hairs of all types. Francesco Palú’s flies guided me to explore the possibilities of using deer hair; I began using hair from different parts of the body and doing much more than muddler heads or poppers. Deer hair, after being wrinkled and mixed, can be used in dubbing loops of all kinds, and with it can be done insect imitations with vibrating hairs in the water very similar to natural insects. I try to create my flies based on the reaction of the trout, not on what I like, that’s why I test the flies adding or taking pieces until reaching simple models, attractive and effective. Deer hair as used in this fly give me the possibility of creating diffuse silhouettes that, seen from below, look like an insect in permanent motion. Adding ice dubbing imitates the bubble in caddis adults when they submerge to lay eggs. Not only the pupa seems wrapped by a bubble in adults, this can be seen when they dive, and my caddis are thought to do this, as I make them sink when I see adults laying eggs instead of hatching.This is simple because if they leave the surface heading to the trees, then it’s a hatch; but if they go back to the surface they’re laying their eggs.On a dubbing loop or simply on the thread with different deer hairs, you’re going to create hackles and bodies for all kinds of flies, with much more life than with rooster hackle with straight fibers. The broken and twisted deer hair seems to be in constant motion, and when wet they soften and move in different independent directions, giving life to the fly and natural acceptance by the fish. When trout take my fly just like it takes naturals, with no fear or rush, I consider my fly has reached the right level of design. It’s very nice to achieve a fly that catches fish, for there are too many made to catch us fishermen.
Move the mouse over the image to zoom in the fly.
Touch the image to zoom in the fly.

List of materials
MaterialsHook: Partridge BIN, barbless from 8 to 14.Thread: 6/0, white color.Abdomen: red deer mask or whitetail hair taken from the base of the ear, with Ice Dubbing in colors pearly or chartreuse.Internal wing: 2 CDC feathers, medium size, natural dun color.Top wing: synthetic Organza, color beige, painted with markers.Antennae: red deer summer hair.Thorax: red deer ear hair, or fine coastal deer hair, with Ice Dubbing, colors peacock or black. View more...MaterialsHook: Partridge BIN, barbless from 8 to 14.Thread: 6/0, white color.Abdomen: red deer mask or whitetail hair taken from the base of the ear, with Ice Dubbing in colors pearly or chartreuse.Internal wing: 2 CDC feathers, medium size, natural dun color.Top wing: synthetic Organza, color beige, painted with markers.Antennae: red deer summer hair.Thorax: red deer ear hair, or fine coastal deer hair, with Ice Dubbing, colors peacock or black.
Steps
Step 1
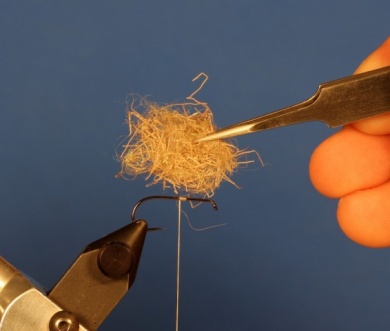
To prepare the deer dubbing, cut some of it and make a small tight ball with some pearl ice dubbing too. If the hair is a bit wet you will lose less of it. Doing this, it will curve and bend acquiring character.
Step 2
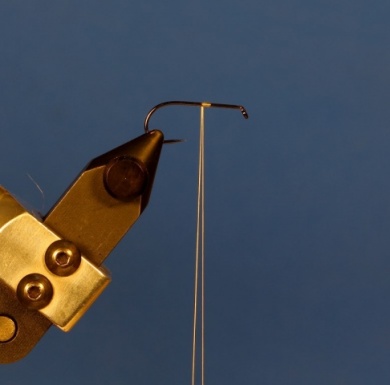
With a needle (the one from sewing machines works well) we can cut the thread in two halves, as even as possible.
Step 3
Insert the dubbing and distribute it. We’ll know how much is enough with some practice.
Step 4
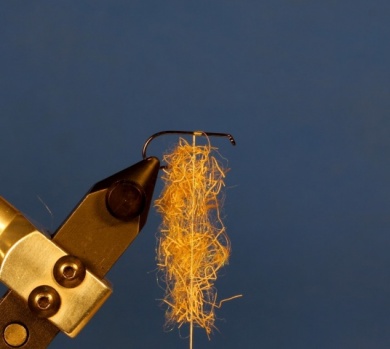
Make a loop with the thread, like doing a traditional dubbing loop. Comb it to the back, as a streamer hackle, to shape the abdomen with the hairs inclined towards the back. When finished, trim it to achieve an oval shape.
Step 5
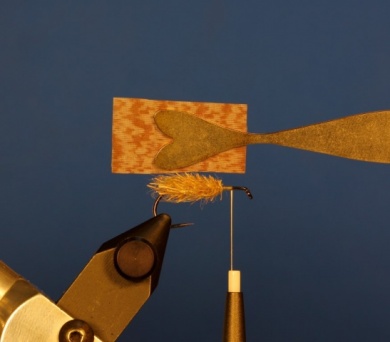
This is the material for the top wing. A thin synthetic mesh painted with marker. To burn, put the flame 2mm away from the material, that should do it without burning.
Step 6
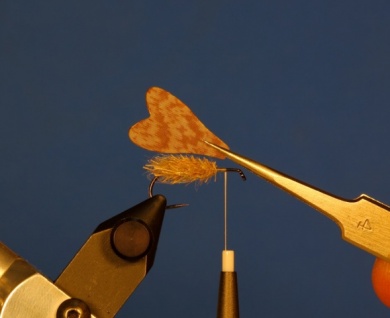
Finished wing, correctly burnt making it very enduring.
Step 7
Covering the top section of the fly, tie 2 CDC feathers, to make the internal wing.
Step 8
Tie the synthetic wing over the internal one, it should cover the upper 180° of the abdomen.
Step 9
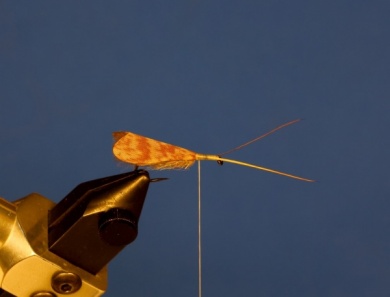
With two summer red deer hairs (resistant and, flat, conic shaped) make the antennae, two times the abdomen in length. These point a bit upwards.
Step 10
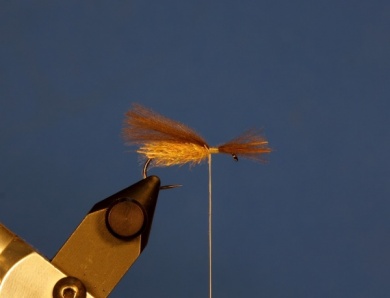
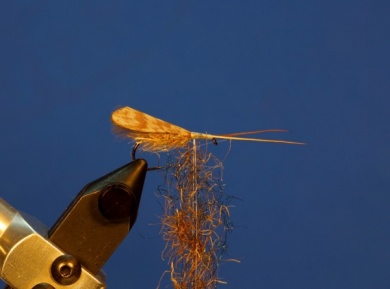
Make a dubbing with deer ear hair adding ice dubbing (black or peacock color). You can use fine coastal deer instead. Proceed as done with the abdomen.
Step 11
Wrap the dubbing, brush it with a wire brush or the needle leaving some hair loose.
Step 12
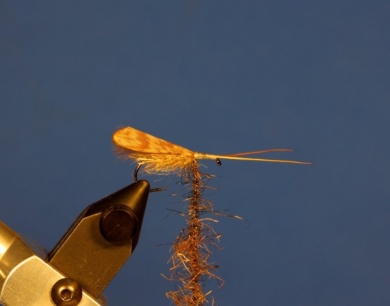
Comb the hair backwards to make the thorax, the material should be just enough.
Step 13
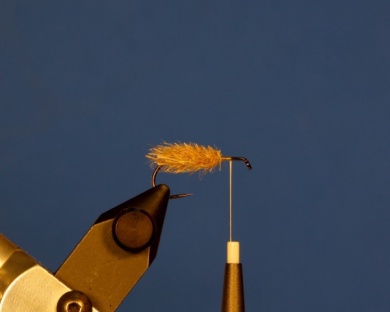
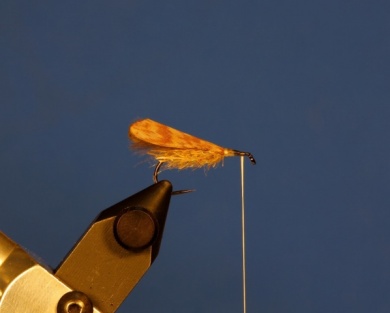
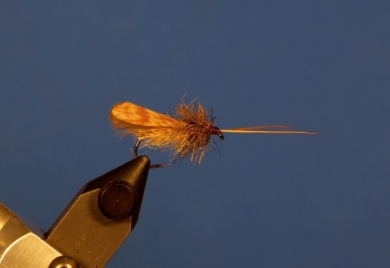
Cloase with a whip finish (6 turns), paint the head with brown marker, add UV lacquer or cianoacrylate. This is an enduring caddis, it’s best to use a strong lacquer so the thread in the head lasts longer.