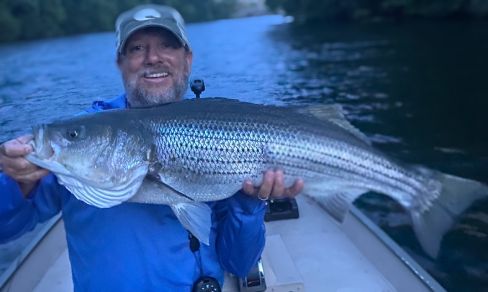
The Zonker Variation is a particular streamer that was created by Dan Byford from Steamboat Springs in the 80s. It has resisted time with only some slight modifications in its original style and design. We have used it for catching various kinds of fish, from colossal tarpons to sophisticated trout, View more...The Zonker Variation is a particular streamer that was created by Dan Byford from Steamboat Springs in the 80s. It has resisted time with only some slight modifications in its original style and design. We have used it for catching various kinds of fish, from colossal tarpons to sophisticated trout, without forgetting the Amazonia peacocks that went for white Zonkers with such violence I had never seen before.We can fish this fly in diverse angles on the river current and applying several stripping methods, from dead drifts to erratic and fast pulls. In cold waters, slow stripping and sinking lines are recommended. With the leader alone in the water, we can move it around rocks in pockets, letting it sink and swim away from the rocks smoothly. With murky waters, after rainy days, a good Zonker is unbeatable with brown trout. Make sure you try super small sizes (12 and 14) even during hatches; you will be surprised with the results.
Move the mouse over the image to zoom in the fly.
Touch the image to zoom in the fly.

List of materials
Tying MaterialsHook: straight-eye Daiichi 1750, from 14 to 2, (straight-eye Mustad 9674 in the original Zonker).Thread: 6/0, black for the head. 3/0, red Monocord for the back.Underbody: Zonker Tape, Lead Tape or adhesive aluminum tape.Body: silver Mylar tube, or golden or pearled (silver or golden on the original Zonker).Collar: mallard duck feather (grizzly rooster on the original Zonker).Wing: fine rabbit strap (grey on the original Zonker).Cheeks: Jungle Cock, optional. View more...Tying MaterialsHook: straight-eye Daiichi 1750, from 14 to 2, (straight-eye Mustad 9674 in the original Zonker).Thread: 6/0, black for the head. 3/0, red Monocord for the back.Underbody: Zonker Tape, Lead Tape or adhesive aluminum tape.Body: silver Mylar tube, or golden or pearled (silver or golden on the original Zonker).Collar: mallard duck feather (grizzly rooster on the original Zonker).Wing: fine rabbit strap (grey on the original Zonker).Cheeks: Jungle Cock, optional.
Steps
Step 1
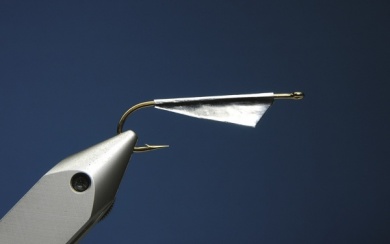
To shape the under body we will use an adhesive lead sheet, known as Zonker Tape. Cut a section as wide as the hook shank and leave space for the hackle, the tail and the head.
Step 2
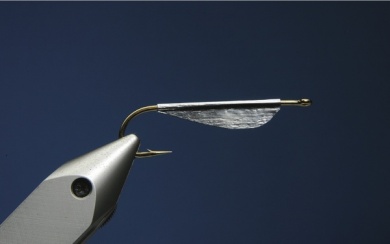
Carefully let go the paper of the adhesive tape and turn it over the hook shank, cutting it as seen on the picture.
Step 3
Once we have made the first cut, round up the lower part to resemble the shape of a minnow. Be careful not to cover the hook gap.
Step 4
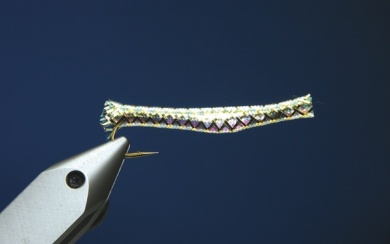
Cut a section of Mylar tube long enough to cover the lead body and also to tie at each end.
Step 5
With the black thread, tie the front section making sure the Mylar tube is closed evenly. There is a little trick to do this: first, tie the thread on your index finger so it does not slip away. Then, place the thread on the Mylar tube where we will tie it, and make a loose turn so our index finger remains close to our chest and the bobbin on the opposite side. Then, pull in opposite directions with our finger and the bobbin, so that the thread makes an even circle and starts closing, avoiding a View more...With the black thread, tie the front section making sure the Mylar tube is closed evenly. There is a little trick to do this: first, tie the thread on your index finger so it does not slip away. Then, place the thread on the Mylar tube where we will tie it, and make a loose turn so our index finger remains close to our chest and the bobbin on the opposite side. Then, pull in opposite directions with our finger and the bobbin, so that the thread makes an even circle and starts closing, avoiding any wrinkles on the Mylar tube. It is important that the diameter of the tube is correct, the underbody must fit precisely, not too tight nor loose.

Step 6
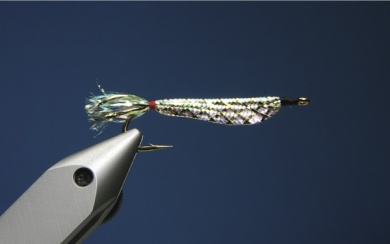
Closing the front section and cutting the thread, change the thread and use the red one to tie the tail section as we did before, but let some tube overhanging to make a tail. Tie and trim. It’s time to cover the body with epoxy and let it dry.
Step 7
Tie a duck or partridge (or similar) feather by its tip, combing the barbells towards the tail of the fly.
Step 8
Keeping the barbells towards the back, wrap the feather to make the collar of the fly.
Step 9
Pick a nicely barred rabbit strap, as fine as possible so it does not lose transparency in the water, and tie it firmly right before the collar, but without touching it so it does not ruin it.
Step 10
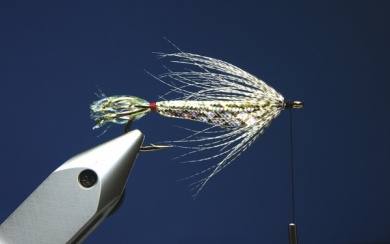
You can add some Jungle Cock or similar feathers at the sides. It makes the Zonker more elegant and also more effective. Finish a neat conic head.
Step 11
Finished fly. Ready to have the rabbit strap tied at the back.
Step 12
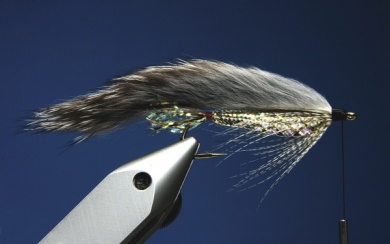
Carefully lift the rabbit strap and re-connect the red thread. Wet the strap, open it up with a needle and tie the red thread until you make sure that it will stay firm. Tie and then cut the thread. Carefully comb the rabbit strap towards the tail.